Debugging Long Robot Programs: Best Practices for Complex Cobot Logic
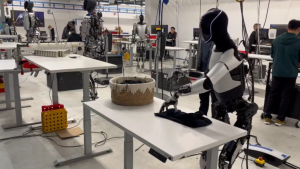
Collaborative robot (cobot) applications often start simple—pick and place, light assembly, machine tending—programmed with intuitive, teach-and-go software. But as applications grow in complexity, so do the programs. Add in loops, conditionals, part checks, and retries, and what started as a clean logic flow can quickly turn into a tangled mess.
In real-world systems—like regrip routines, vision-guided placement, or multi-step assembly cells—debugging becomes a real challenge. A misplaced condition or a missed variable update can halt production or cause erratic behavior that’s hard to diagnose.
The good news: these issues are avoidable. With a few best practices around programming structure, diagnostic output, and modular design, you can drastically reduce the time spent troubleshooting—and make your code easier to maintain, even for someone who didn’t write it.
Why Robot Programs Get Hard to Debug
Robot platforms, especially those designed for ease of use like cobots, are getting better—but debugging still isn’t like working in traditional software IDEs.
While many cobot interfaces allow you to view live variables, that only helps if you know what you’re looking for. In larger programs, there can be dozens or hundreds of variables in play. Traditional industrial robots often lack variable watch screens altogether, and neither class of system supports true line-by-line stepping during execution.
On top of that, real-world programs include nested loops, conditional branches, and sensor-driven logic—all of which make the execution path harder to follow. And here’s the kicker: the person troubleshooting on the floor is often not the person who wrote the code. That’s a recipe for frustration without some built-in guardrails. Learn more about advanced robot implementations that solve these challenges.
5 Proven Debugging Strategies for Complex Cobot Logic
Strategy 1: Use Section Markers and Print Logs
One of the simplest and most effective tools for debugging is the humble print statement.
Start by breaking your program into logical sections with comments or labels, like Section_A_Start, Section_B_End, etc. Then, sprinkle in targeted print commands to indicate progress through the code:
Print("Started placing clip #2")
Print("Waiting on sensor X")
Print("Completed pickup routine")
This gives you a breadcrumb trail through the program. When an issue arises, you can immediately see where the logic stopped or failed to advance—without needing stepping tools or manual tracing.
Pro tip: If your robot platform supports conditional printing (e.g., only print when DebugMode = TRUE), you can leave these in your final program and enable them only when needed.
Strategy 2: Store Key Variables for Post-Mortem Review
In more complex programs, it’s helpful to log not just where the code is—but what it was doing.
At the end of each critical section (or when a fault occurs), print or log relevant values:
Print("PartType: ", PartType, " Retries: ", RetryCount)
Print("GripperSensor = ", GripperClosed, " Location = ", LastPickPosition)
This is especially valuable for debugging intermittent problems or logic loops. If you only know that the robot stopped, you’re left guessing. If you know it stopped with PartType = 3 and RetryCount = 2, you’ve got a lead.
Some platforms even allow exporting logs or writing to a file or HMI—use those tools if available. For more on implementing diagnostics, see our cobot project examples.
Strategy 3: Modularize with Subroutines
Code gets hard to read—and harder to debug—when it’s all packed into a single, scrolling mega-routine.
Instead, break it into subroutines or callable functions wherever possible:
Call PlacePart()
Call CheckSensor()
Call RetryIfFailed()
This makes it easier to isolate logic for testing. If there’s an issue in CheckSensor(), you can run just that block independently, without worrying about what happened five steps earlier. It also simplifies updates later—if the way you place a part changes, you only need to rewrite one function, not hunt through the whole program.
Even cobots with graphical flowchart-style programming often support function blocks or templates. Use them religiously.
Strategy 4: Build-In Debug Modes
For deeper testing or operator-side troubleshooting, consider building a debug mode directly into your code:
If DebugMode = TRUE Then
Print("Debug: moving to pre-pick position")
WaitForButtonPress()
EndIf
This lets you step through the process manually to isolate timing or motion issues. Some traditional robots require manual programming of these pause points, while many cobots have this feature built in—but it may not be enabled by default in your program template.
Giving your debug tools their own conditional path means you don’t have to strip them out later. You just toggle the mode. Explore our cobot resources for template implementations.
Strategy 5: Use Time-Based Performance Logs (Optional)
Timing is a subtle but powerful debug tool. Store timestamps at key steps in the program—start of cycle, after vision acquisition, part placement, etc.—and calculate elapsed time:
ElapsedTime = TimeNow - LastStepTime
Print("Time to place part: ", ElapsedTime)
This can help detect mechanical issues like slowing actuators, vacuum leaks, or inconsistent part delivery that would otherwise go unnoticed until failure. If your part placement suddenly takes 1.8 seconds instead of 1.2, that’s a red flag.
These time logs also make excellent tools for performance tuning and tracking improvements over time.
Conclusion: Building Maintainable Cobot Systems
Robot programming isn’t just about making the code work—it’s about making it traceable, maintainable, and diagnosable. As collaborative applications grow in complexity, the need for thoughtful debugging tools only increases.
By including print logs, variable storage, modular subroutines, and debug modes from the start, you turn your robot into something far more powerful: not just a worker, but a communicator. It tells you what it’s doing, why it stopped, and how to fix it.
Implement these best practices early in your development cycle:
- Start with modular design before writing complex logic
- Embed diagnostic statements during initial coding
- Validate debug modes during simulation phases
- Document restart procedures for operators
When you’re supporting a production line or getting that frantic “the robot won’t start” call at 7:30 a.m., that kind of foresight pays dividends in reduced downtime and maintenance costs. For more robotics insights, explore our advanced project library or return to our homepage.
Recommended Next Read: How to Build Restartable Robot Programs for Real-World Operators